
Step-by-step fitting guide for YAKKT Roof Rack Solar Brackets. Stainless universal brackets that recess a solar panel into YAKKT crossbars by bolting to supplied T-nuts. Slotted and adjustable to suit common panel frame widths. Works with the higher and lower crossbar mounting positions on every YAKKT rack.

At a glance
| Time to install | 30 minutes |
| People needed | 1–2 |
| Difficulty | Easy |
| Requires fitted YAKKT rack? | Yes |
| Drilling required? | No |
Fitting options & install steps
All YAKKT racks let you mount crossbars in two positions on the side rails — higher and lower. The lower position is 30 mm below the higher holes, matching the thickness of a standard solar panel. Two ways to get a flush finish alongside deck panels:
Option 1 — fix crossbars in the higher position and recess the panel with YAKKT solar brackets, bolting to supplied T-nuts in the crossbar. On larger residential panels, run an extra supporting crossbar in the lower position under the middle of the span.
Option 2 — alternatively, fit crossbars in the lower position, use solar clamps, and sit the panel on top of the bars — the 30 mm offset keeps the surface flush with decking.
01 / 08
Bracket hardware
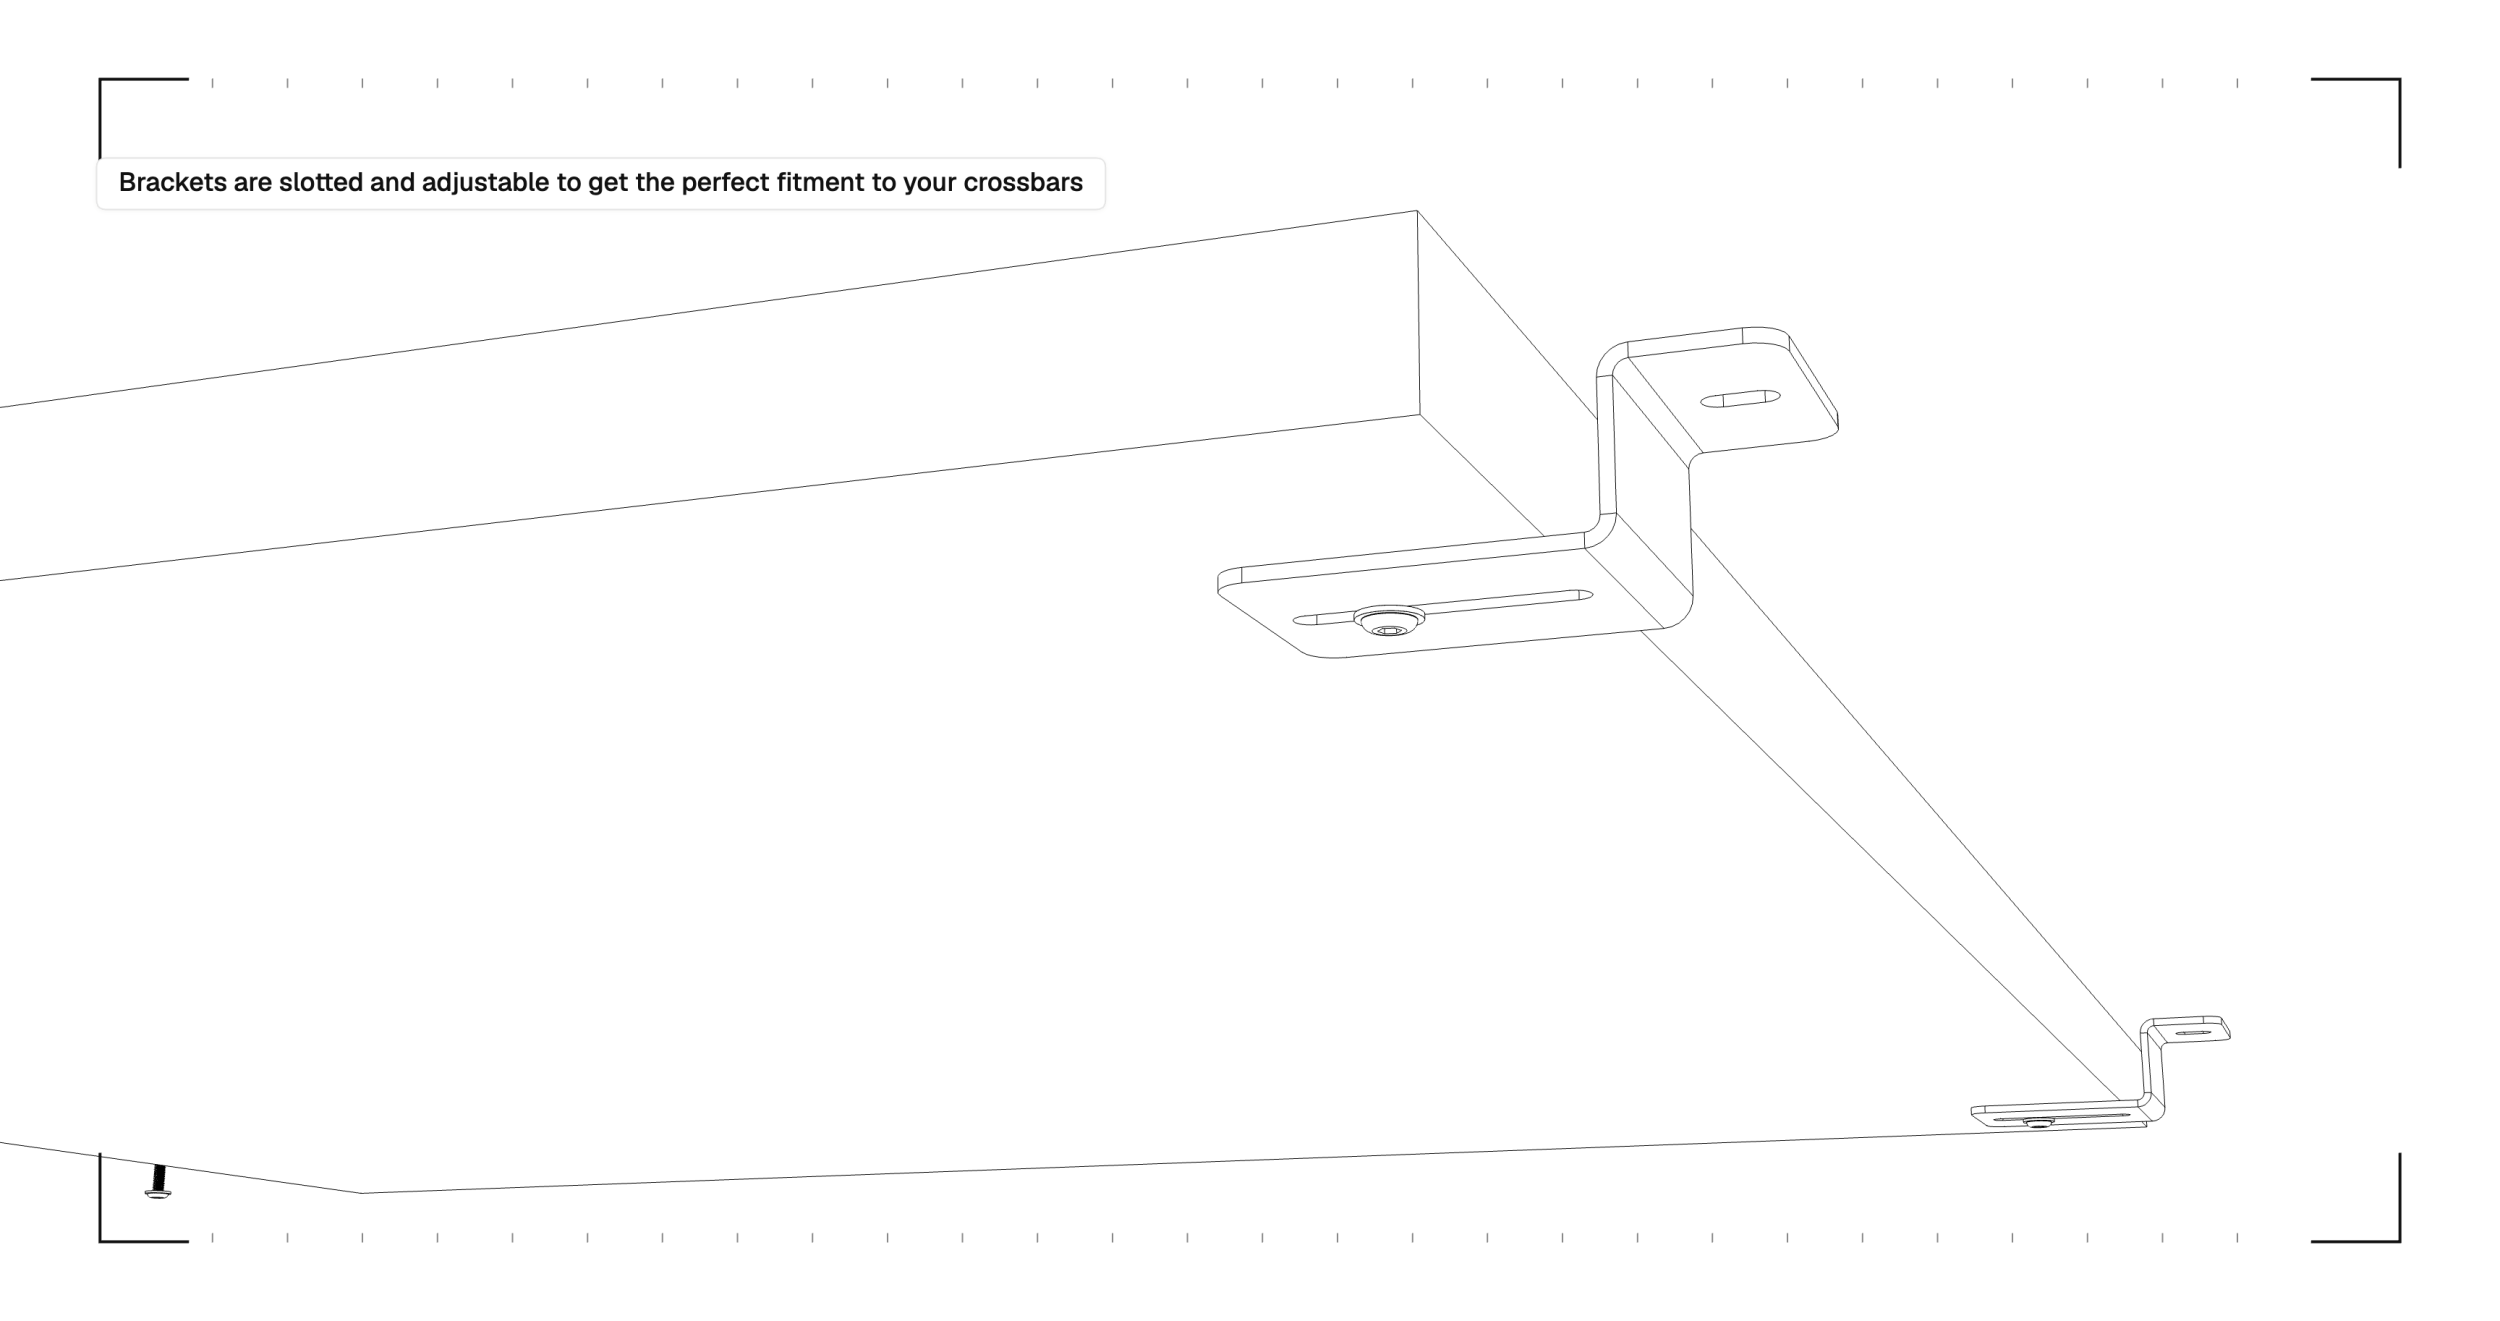
Each bracket is slotted and adjustable so you can dial in the perfect fitment to your crossbars. Slide the bracket along the panel frame slot before tightening, then bolt to the supplied T-nuts in your crossbar once the panel is positioned.
02 / 08
Large panel layout
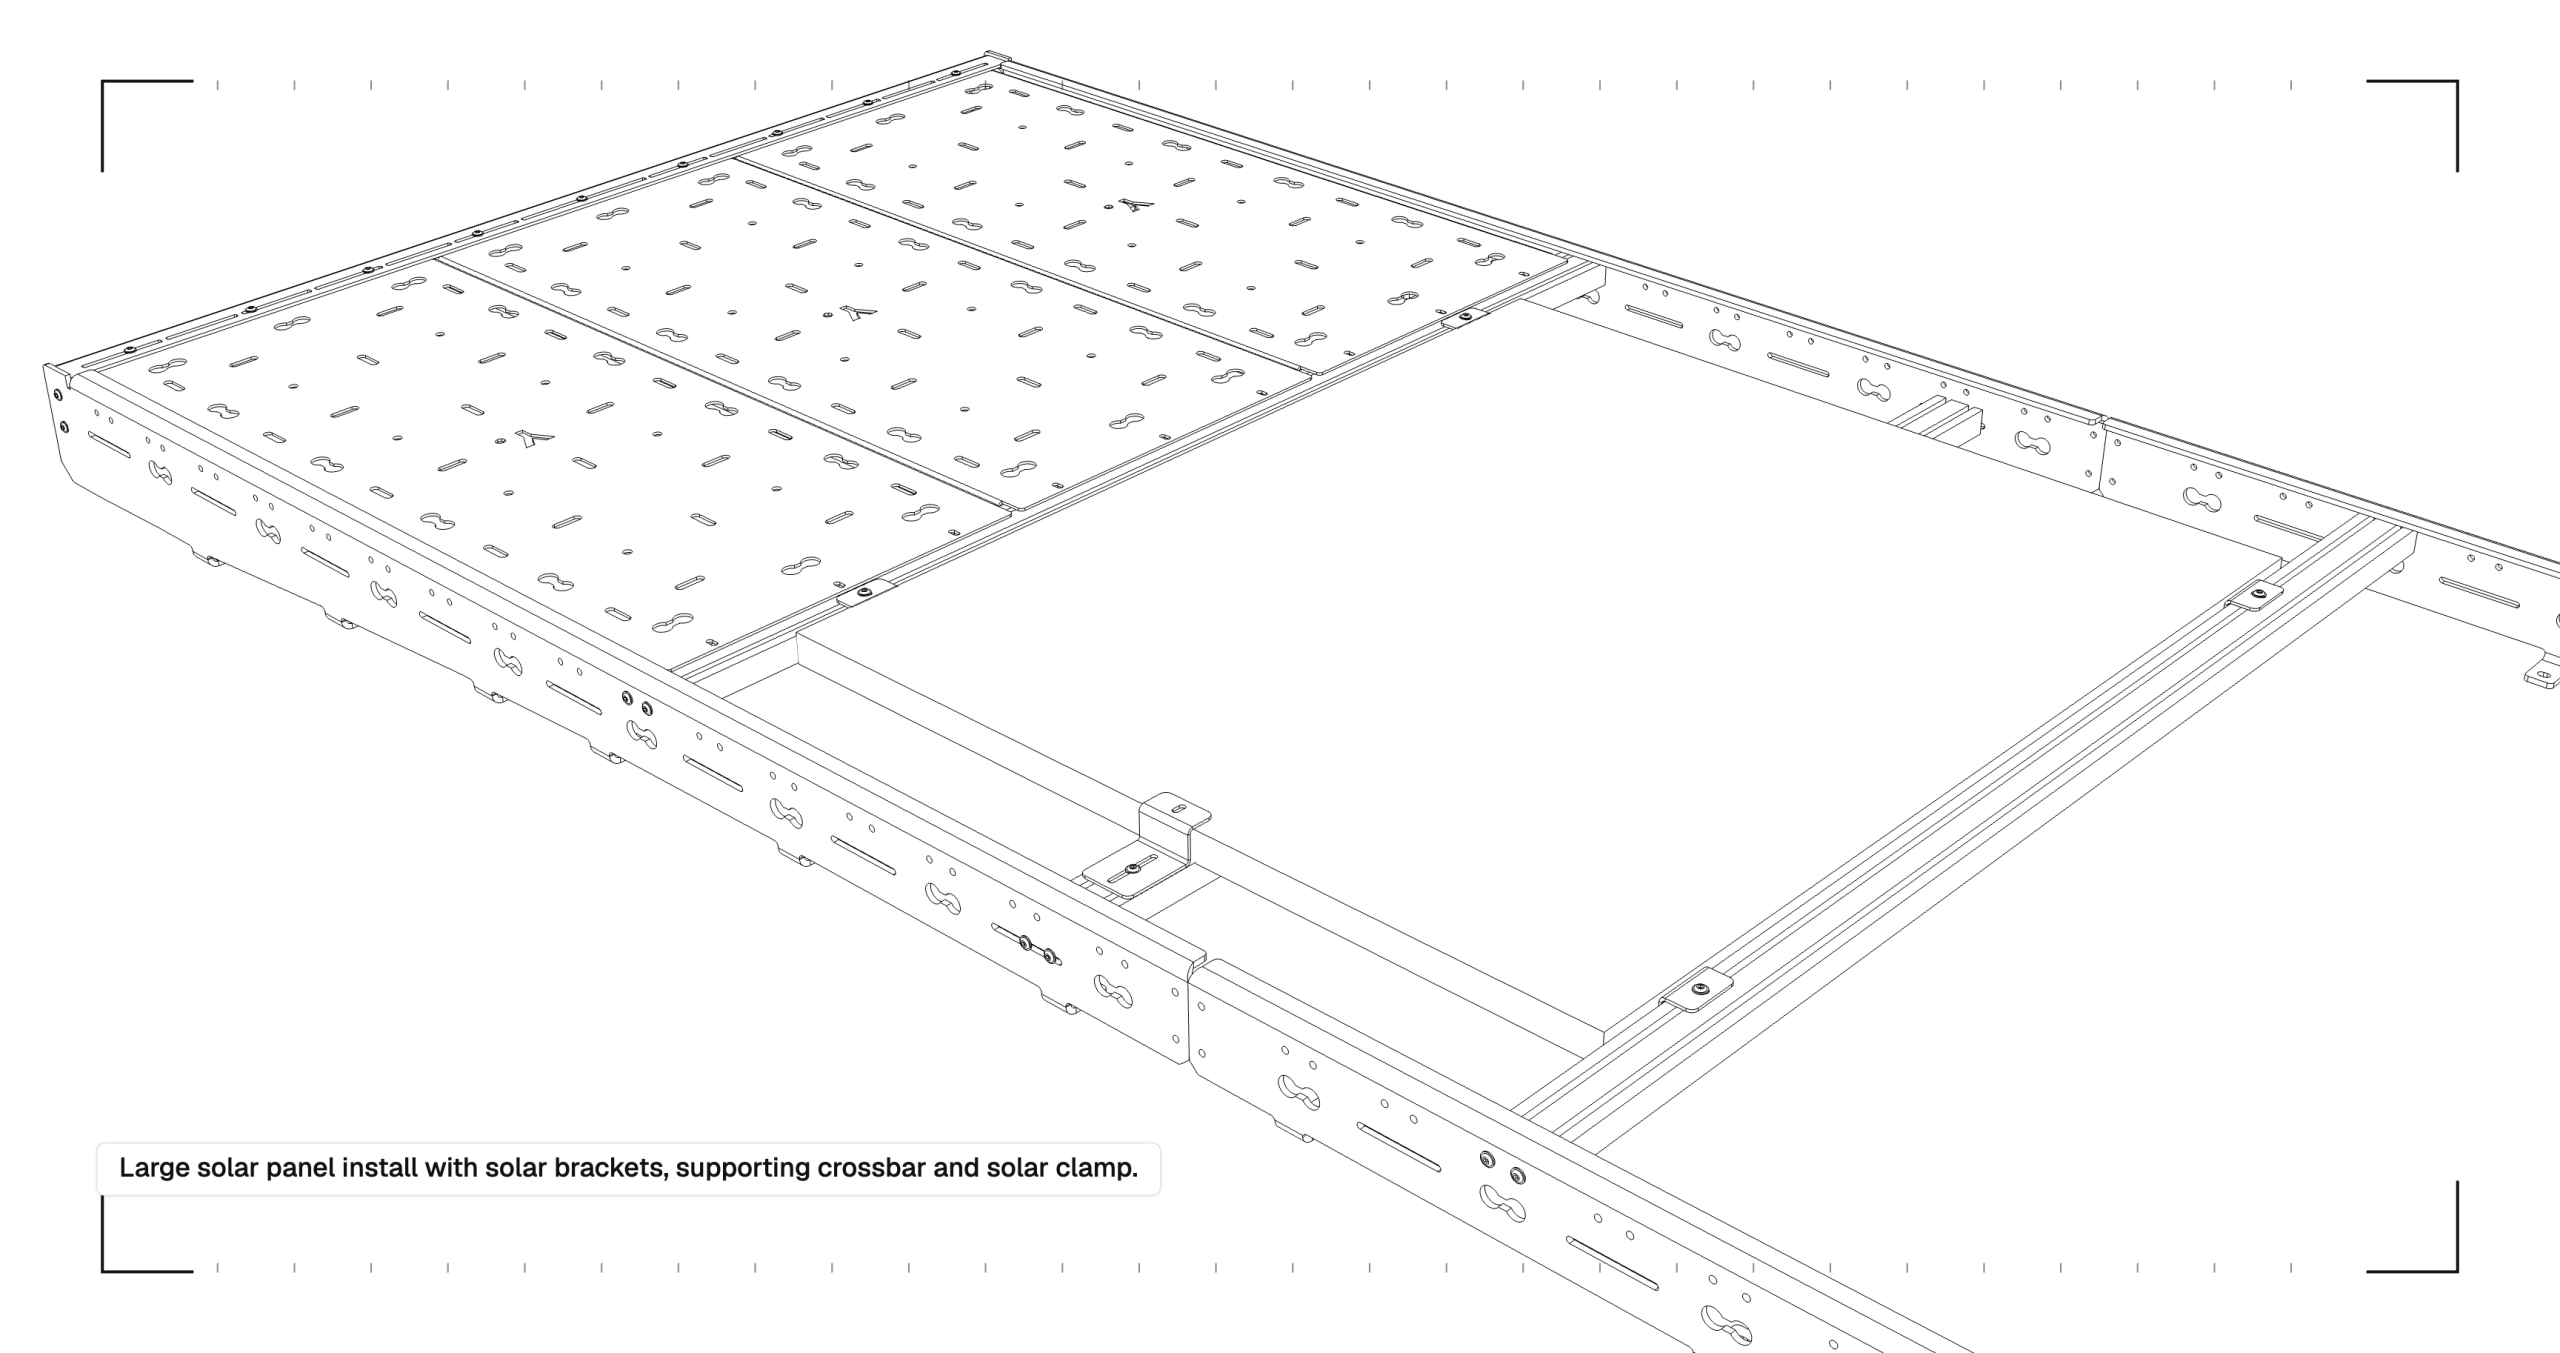
For a large residential solar panel, fix your main crossbars in the higher position and recess the panel with YAKKT solar brackets, bolting to T-nuts in the crossbar. Then run an extra supporting crossbar in the lower position under the middle of the panel span to carry the load. A mid-panel solar clamp on that support bar is commonly used on bigger panels.
Solar clamp not supplied
YAKKT supply the solar brackets. Solar clamps for the mid support bar are not included — they are widely available on Amazon.
03 / 08
Option 1 — Solar brackets (higher position)
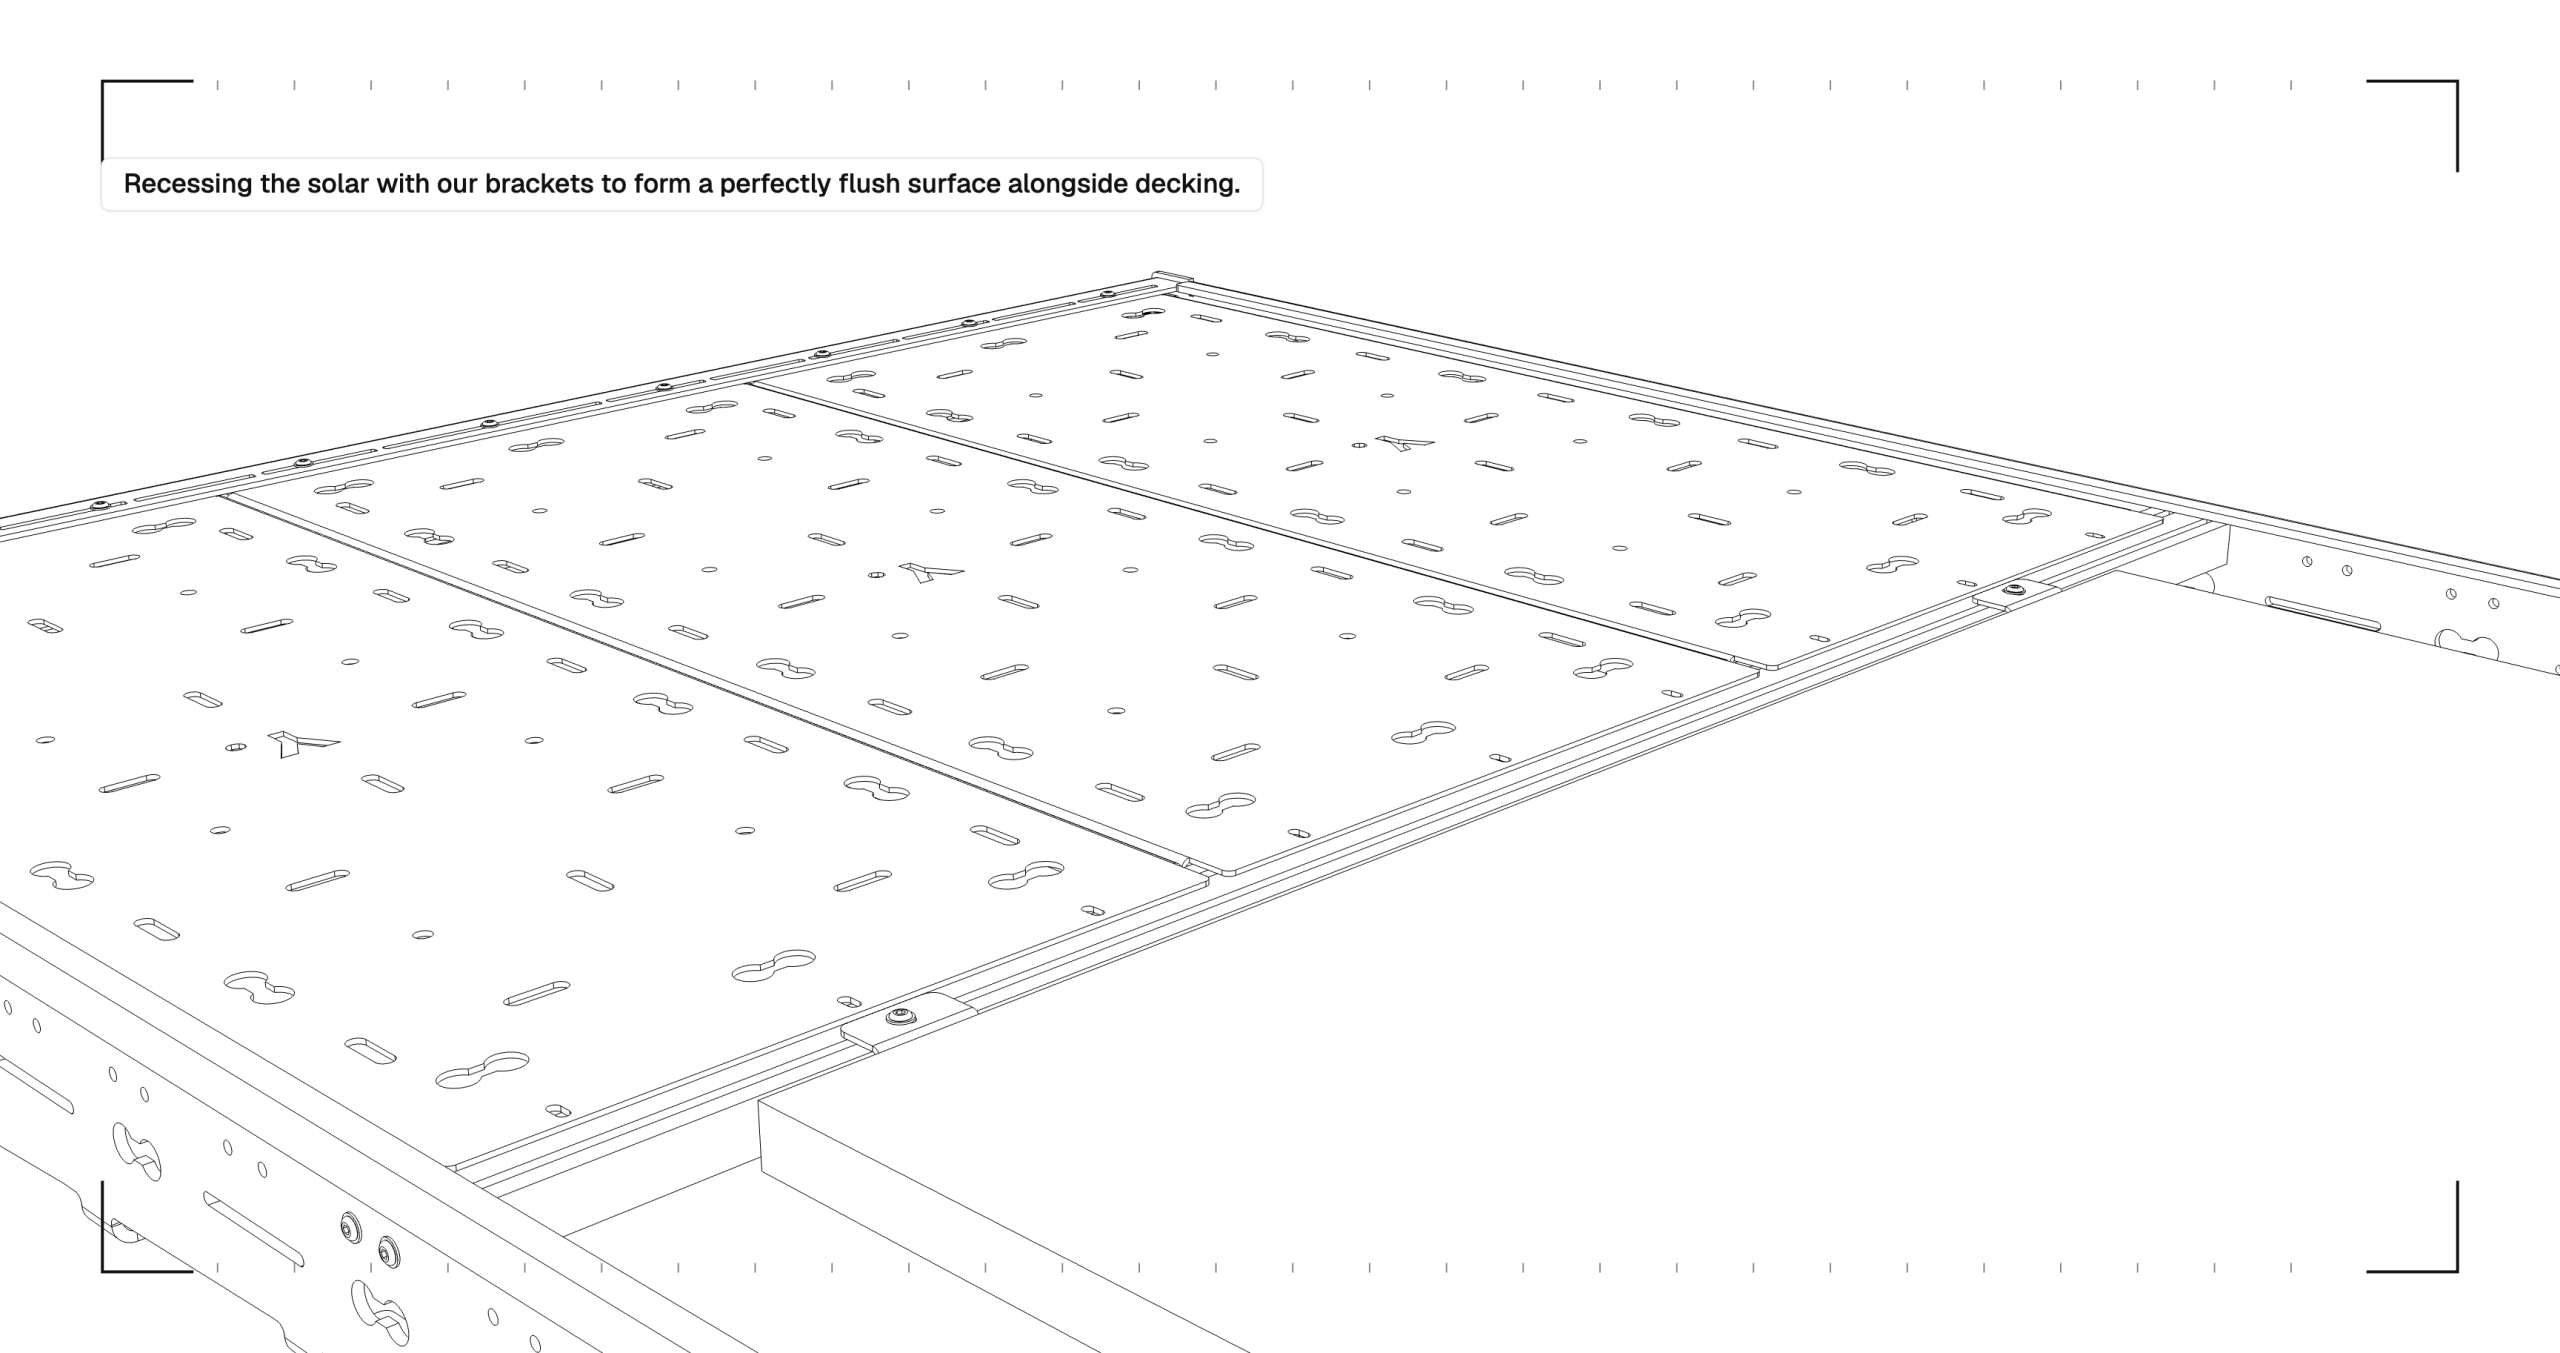
Fix crossbars in the higher mounting position and recess the panel with YAKKT solar brackets so the top surface forms a perfectly flush plane alongside your deck panels. This is the recommended method when using YAKKT brackets.
04 / 08
Not advised — panel on higher crossbars
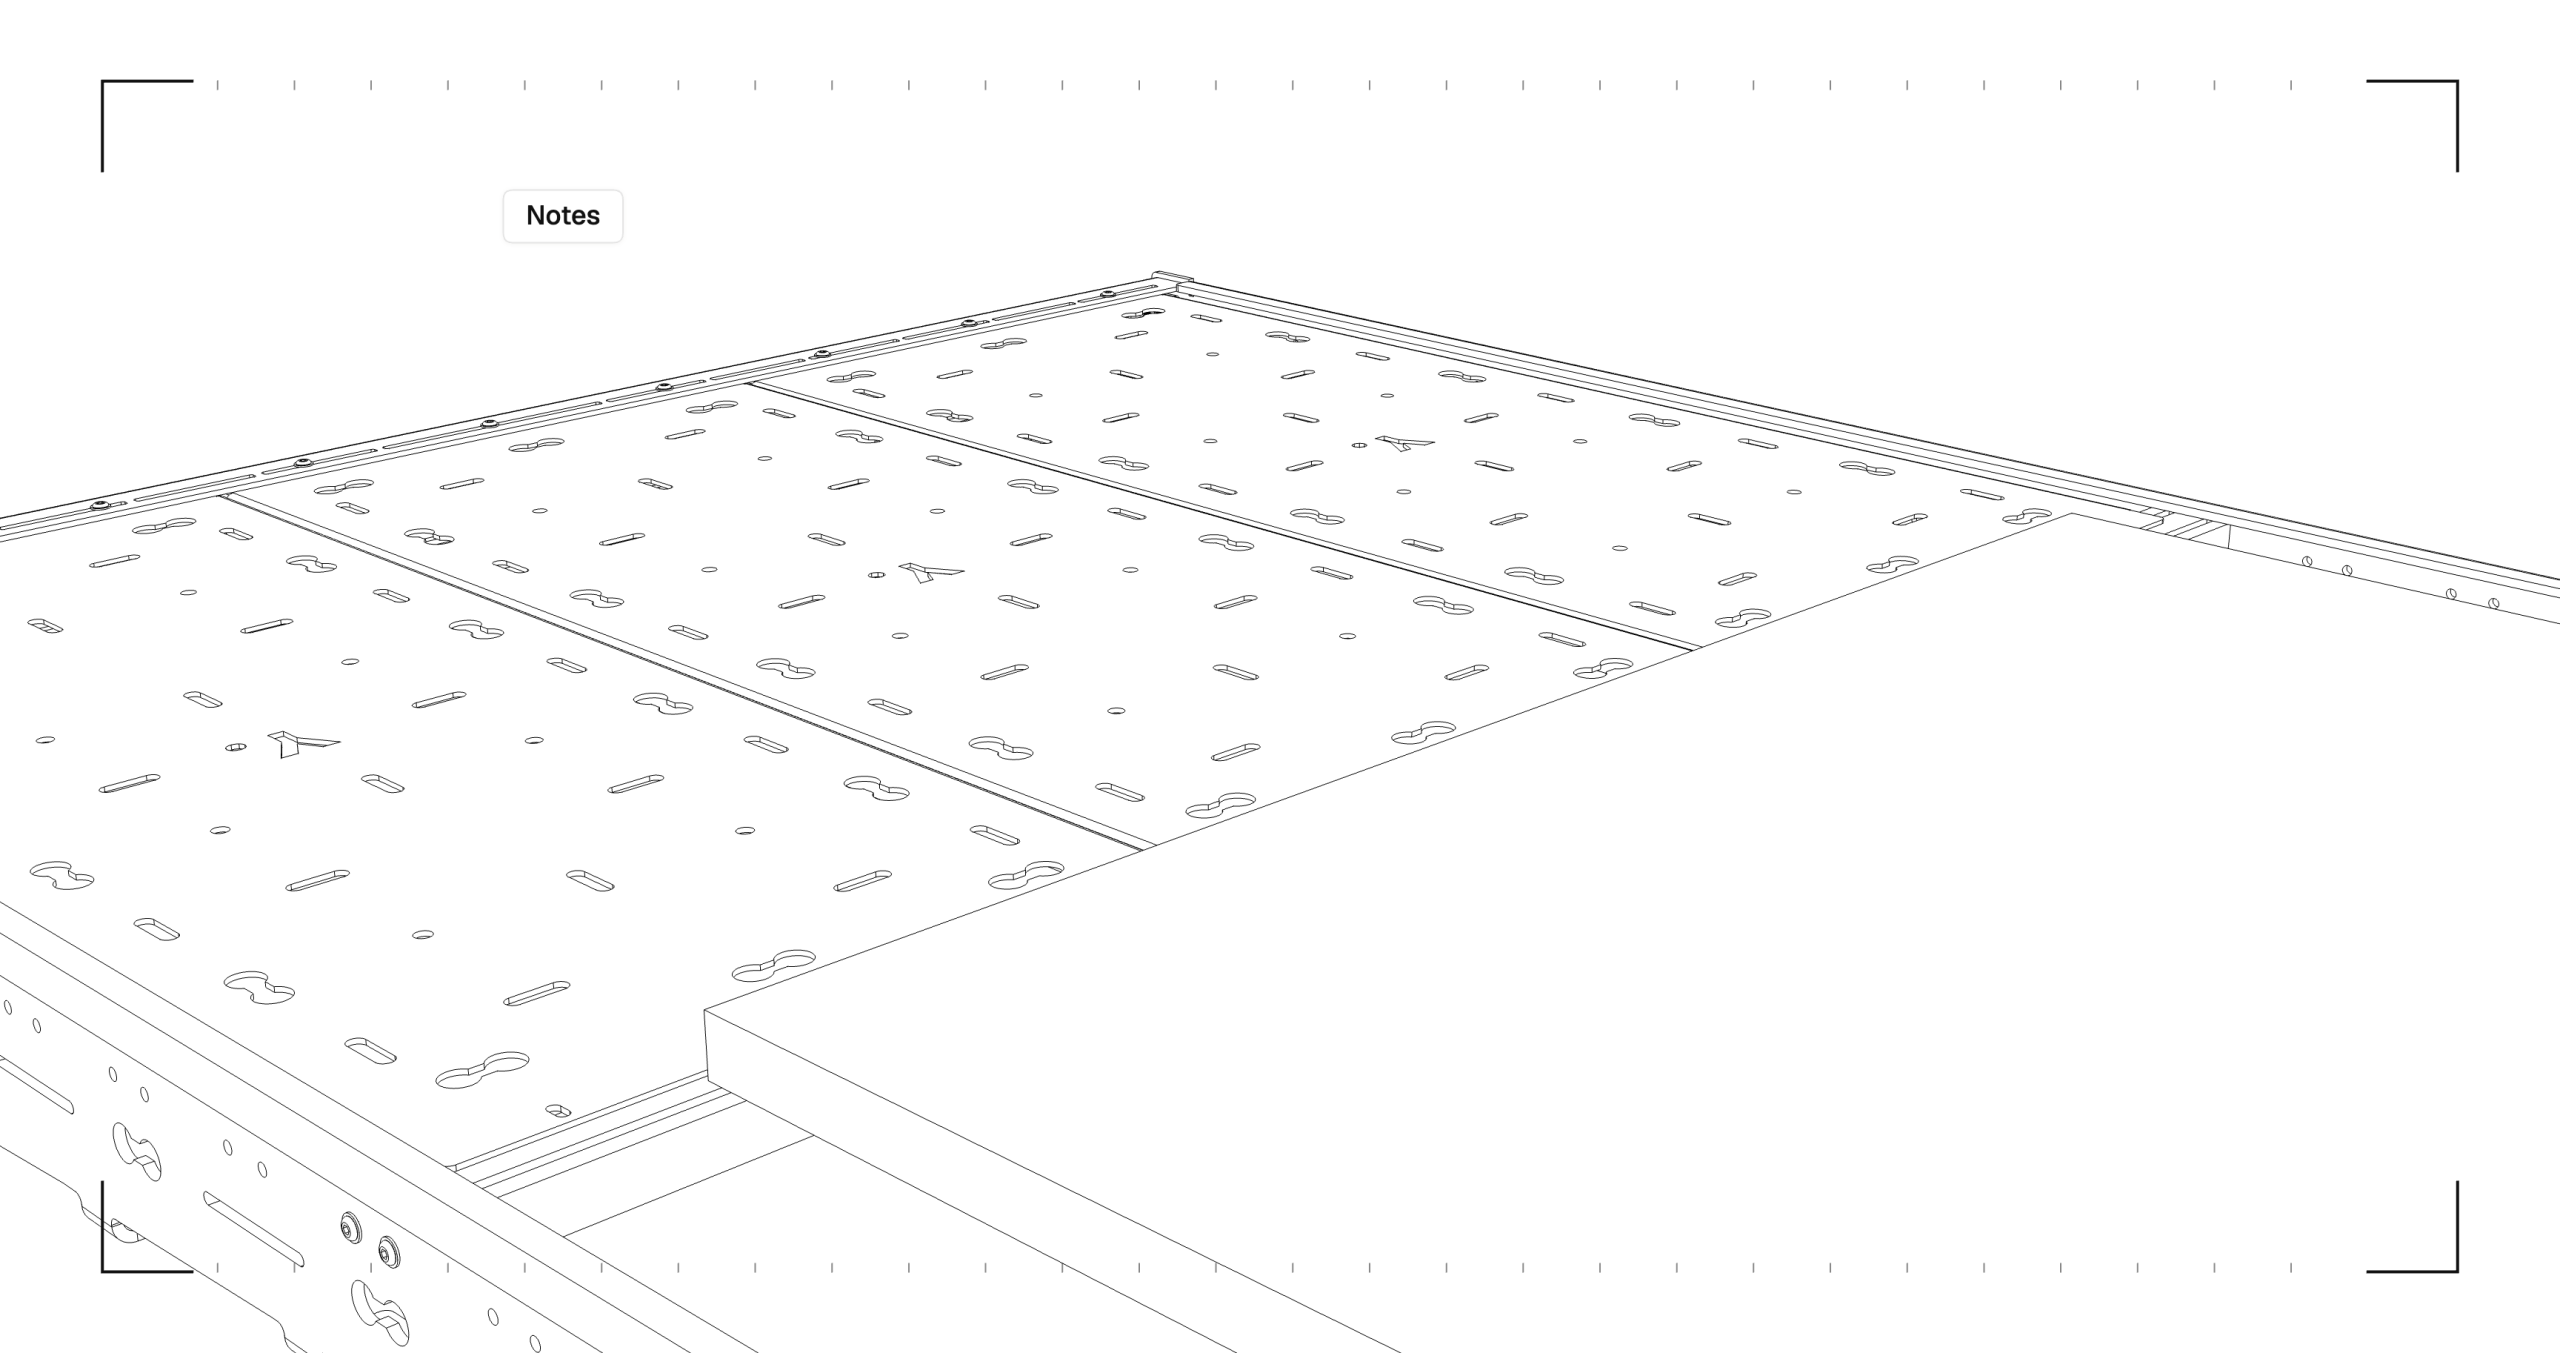
Simply placing a solar panel on top of crossbars in the higher position — without YAKKT brackets or proper clamps — sits the panel above the deck plane and is typically not advised.
Typically not advised
Do not rely on the panel resting on crossbars in the higher position alone. Use Option 1 (YAKKT brackets in the higher position) or Option 2 (solar clamps with crossbars in the lower position).
05 / 08
Option 2 — Solar clamps (lower position)
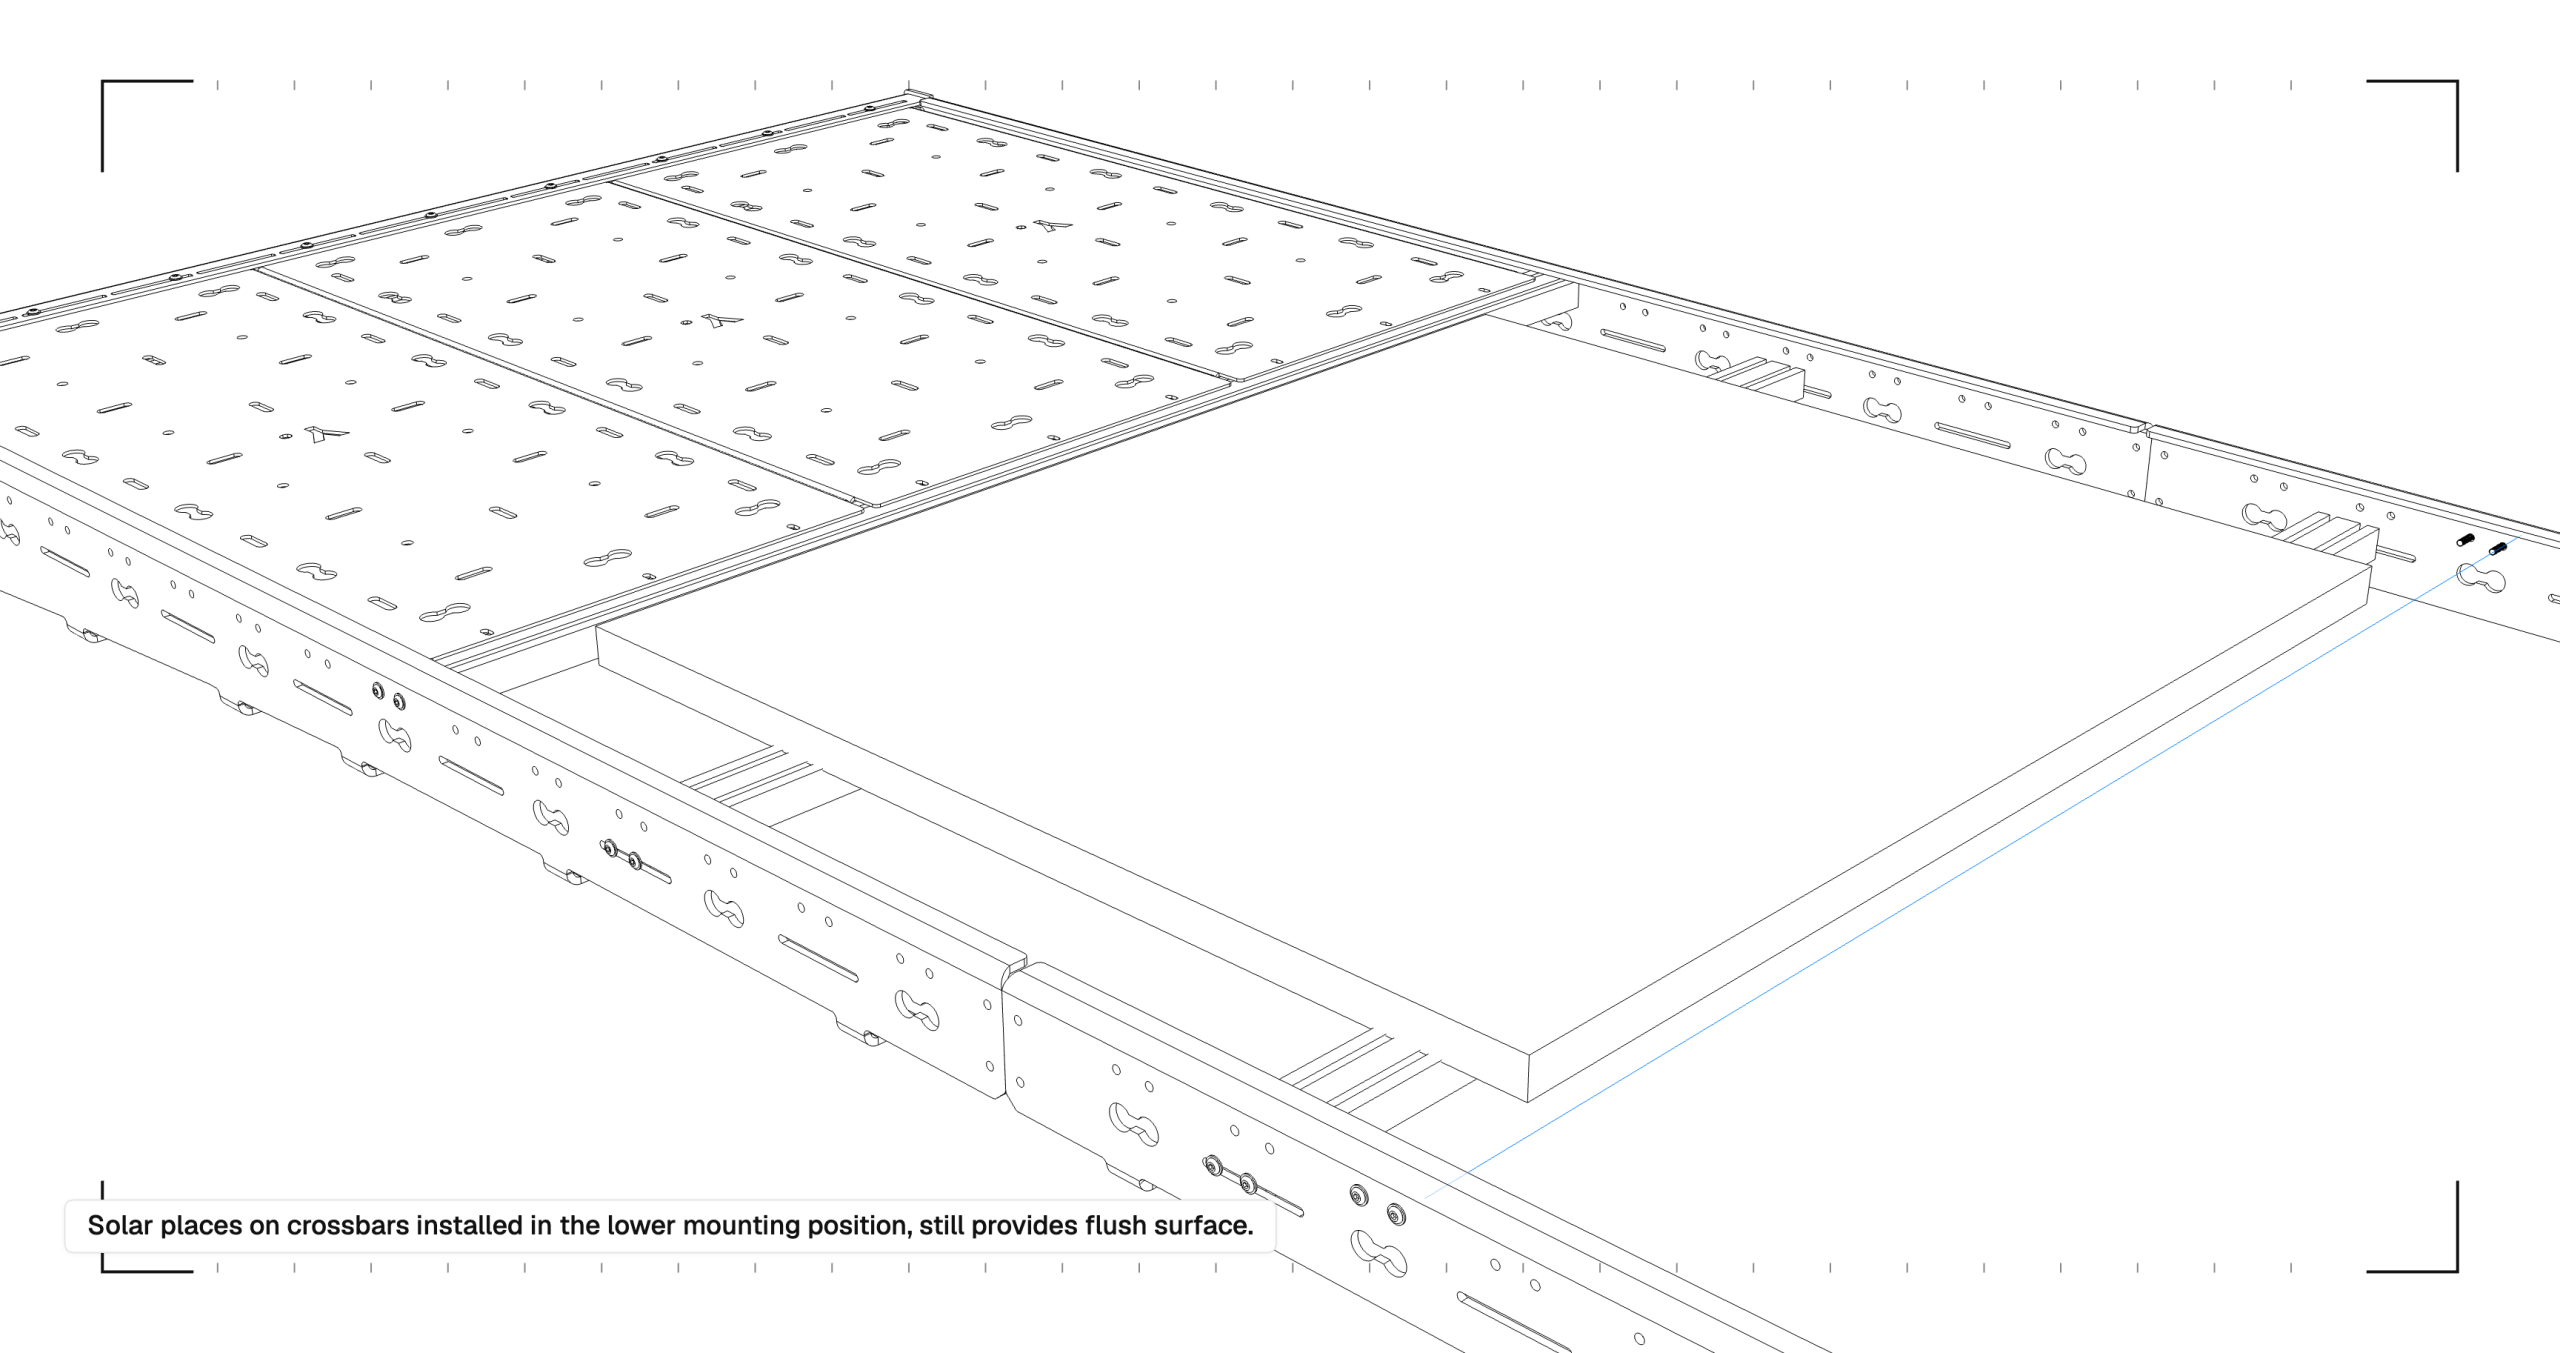
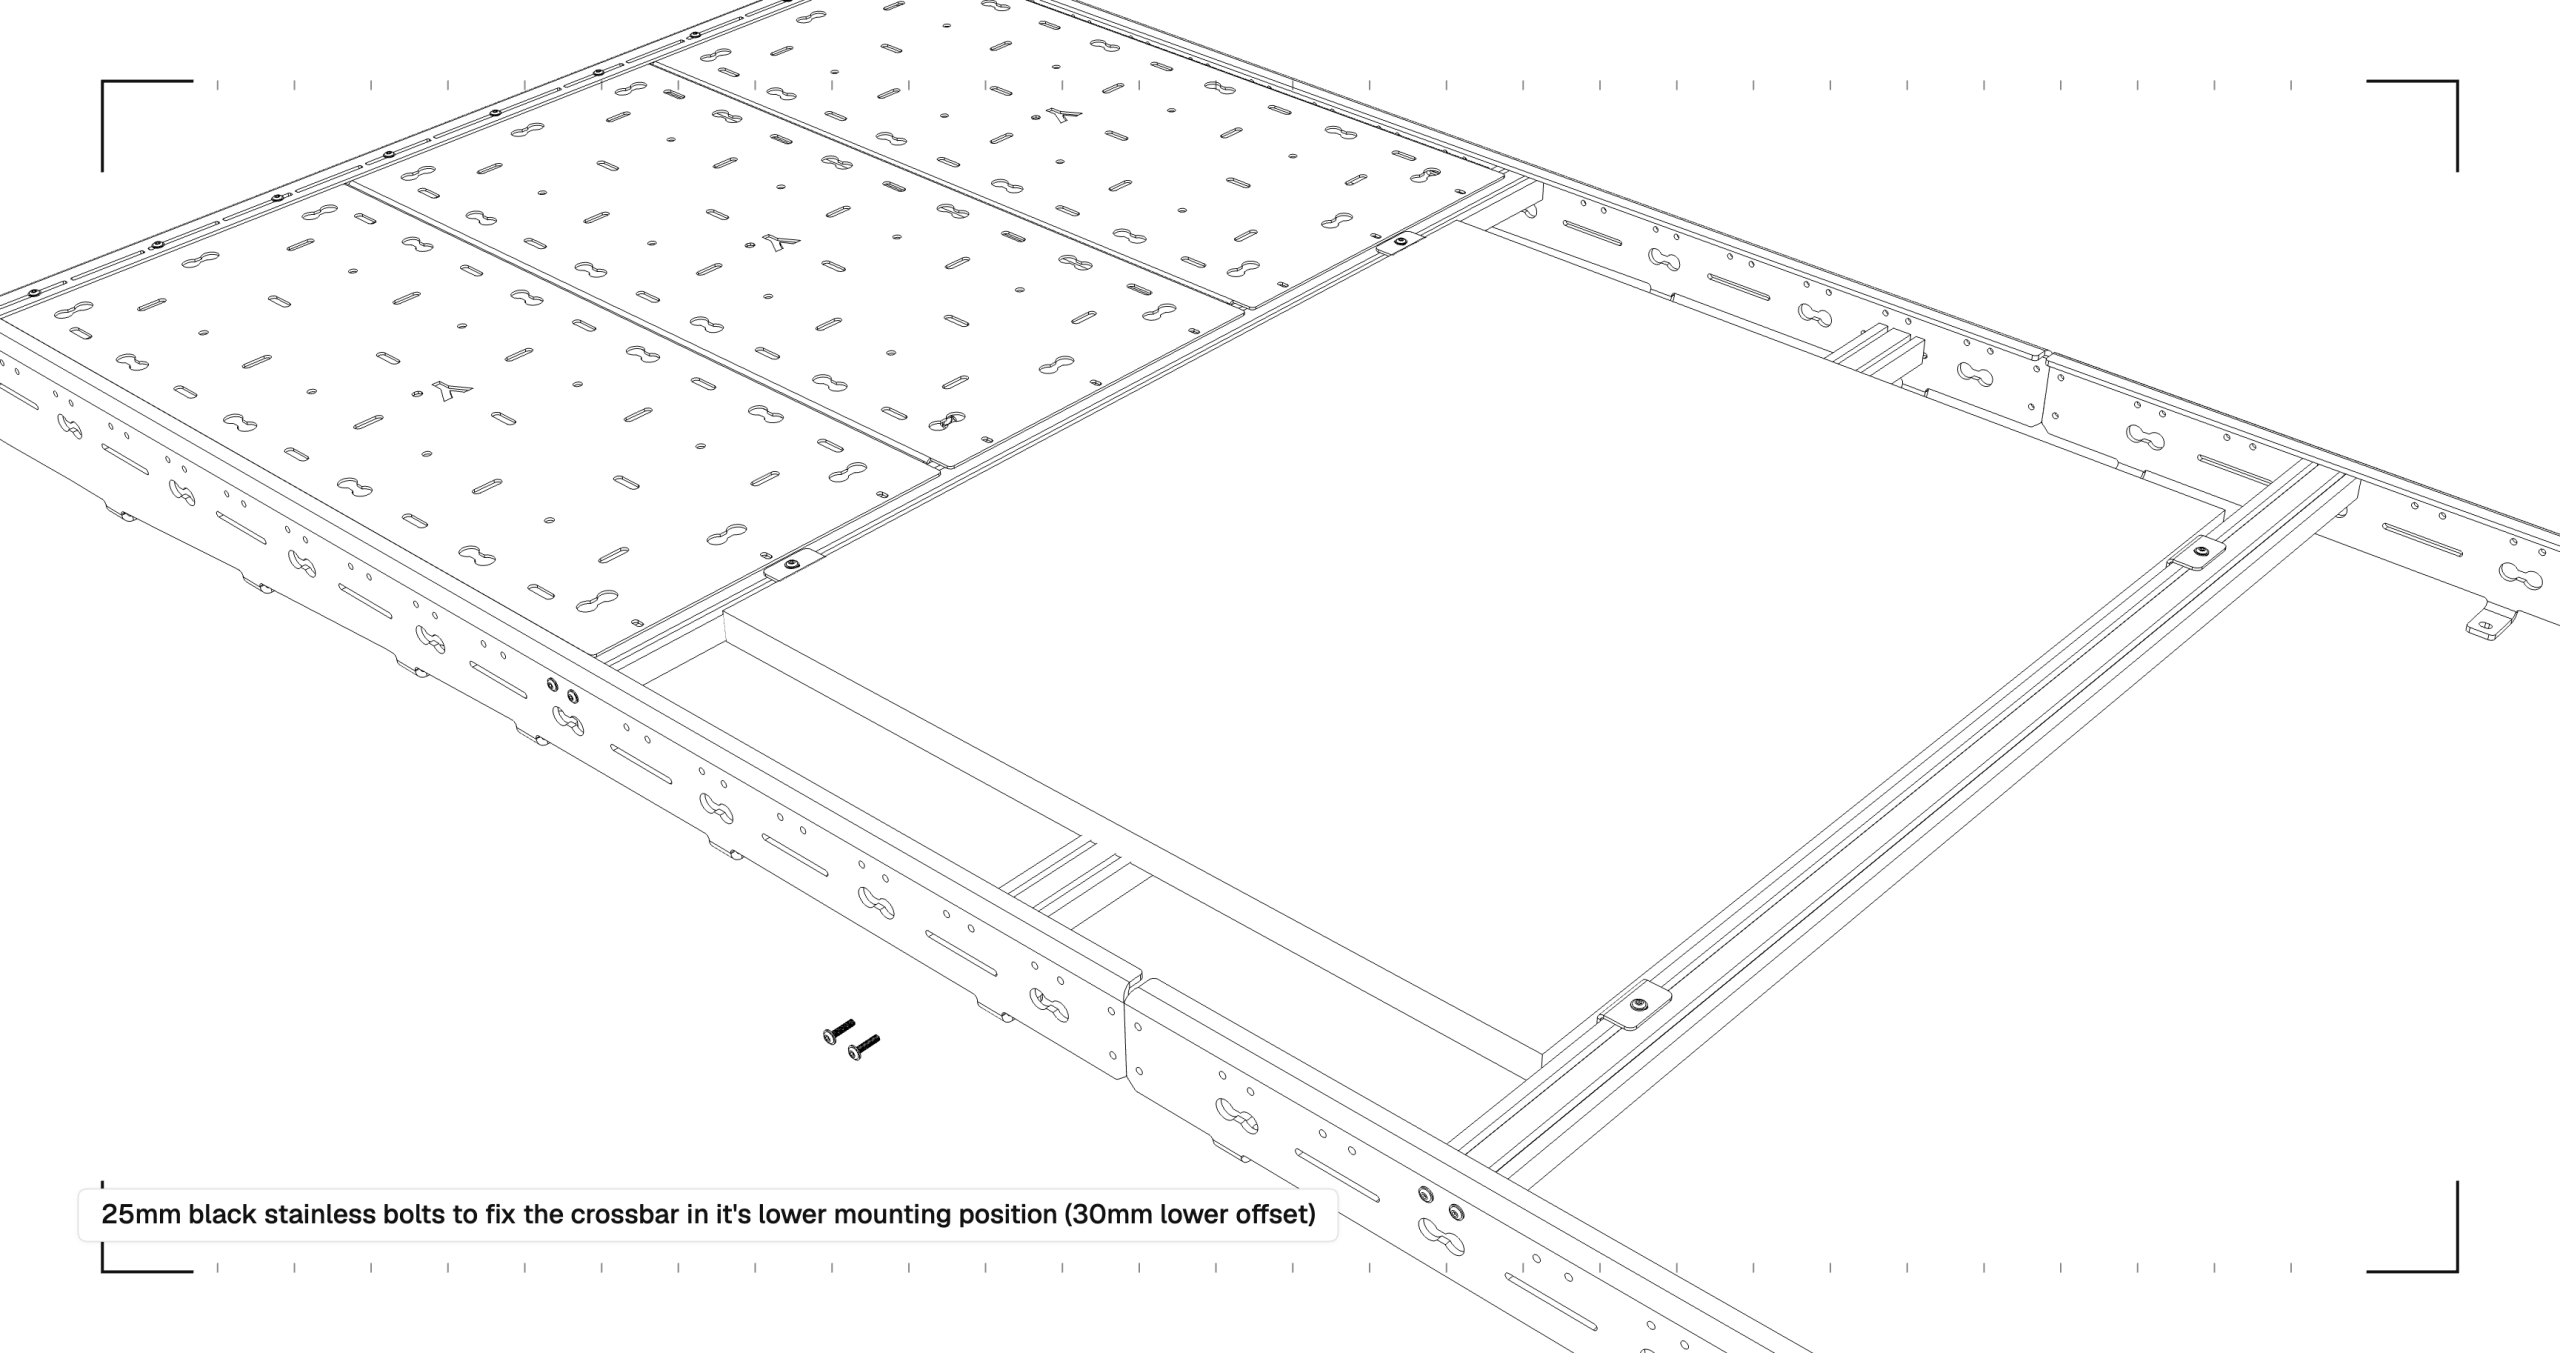
Alternatively, fix crossbars in the lower mounting position — 30 mm below the higher holes, matching the height of a standard solar panel. Use solar clamps and sit the panel on top of the bars. The lower offset keeps the top surface flush with deck panels and side rails.
06 / 08
Crossbar prep — T-nuts
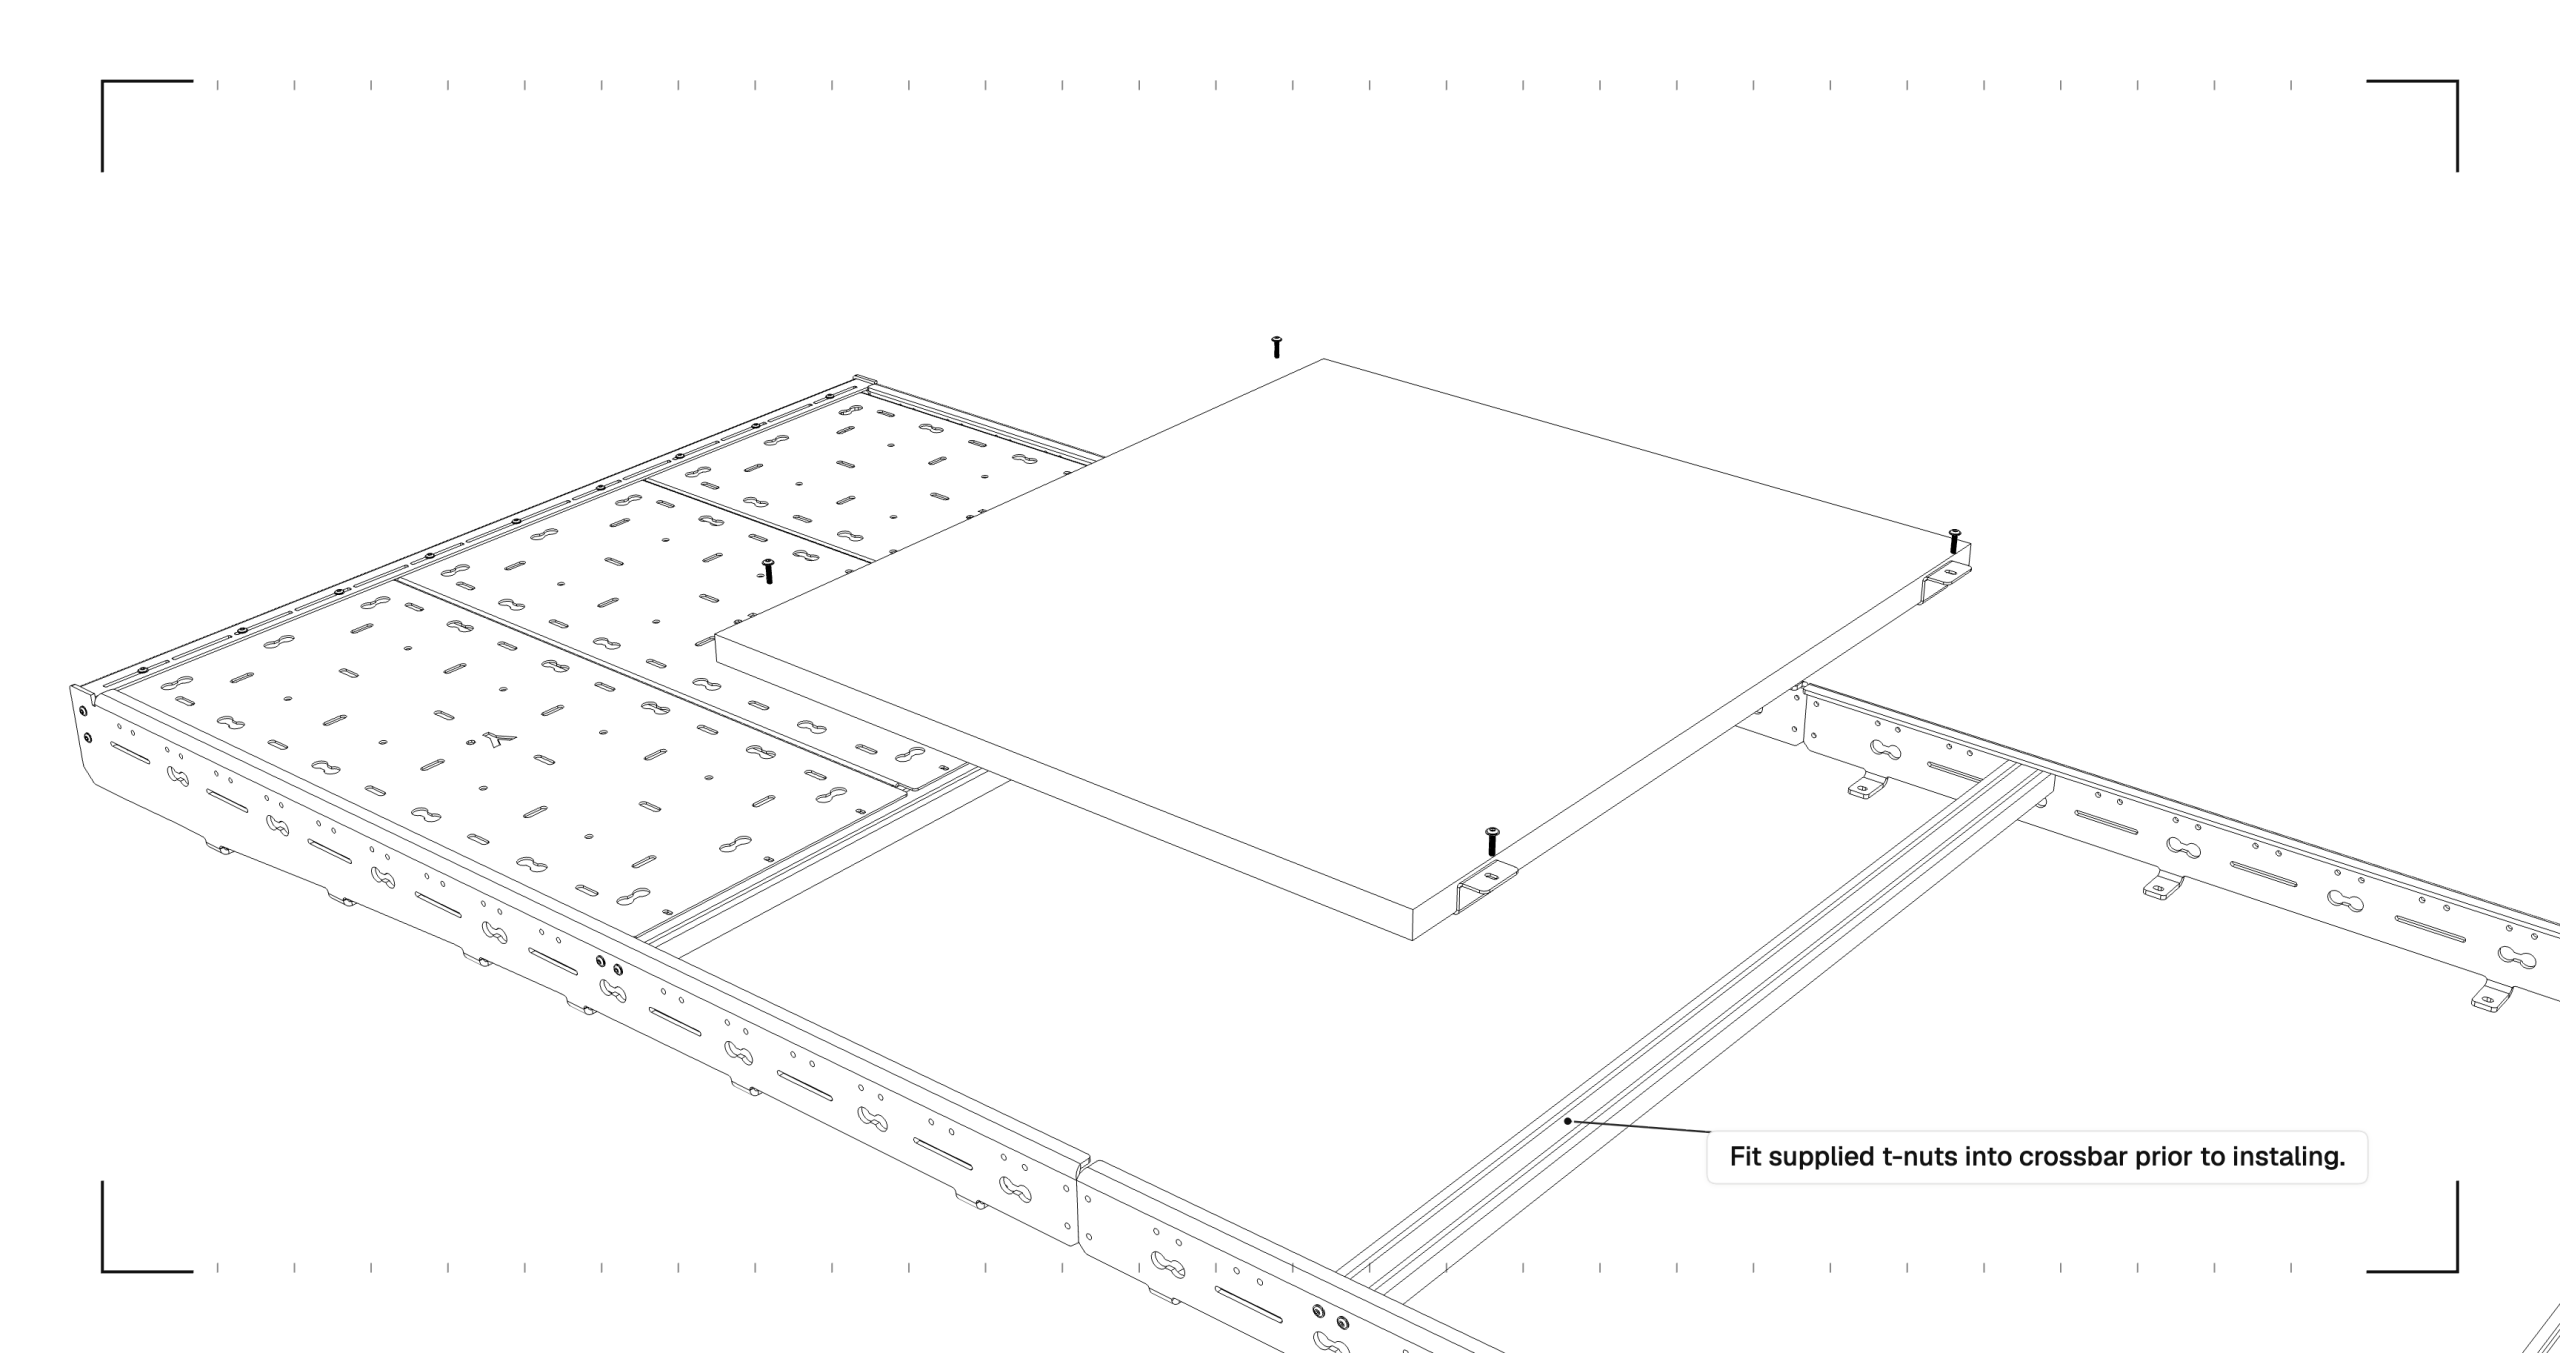
For Option 1, before offering up the panel, fit the supplied T-nuts into the crossbar slot at each bracket position. Leave them loose until the panel is aligned.
07 / 08
Offer up the panel
For Option 1, with crossbars in the higher position and T-nuts in place, offer the solar panel up and bolt the brackets to the T-nuts in the crossbar. On larger panels, fit the supporting crossbar in the lower position under the middle of the span first. Check clearance from fairings, aerials and roof equipment before tightening.
08 / 08
Recessed panel — final fit
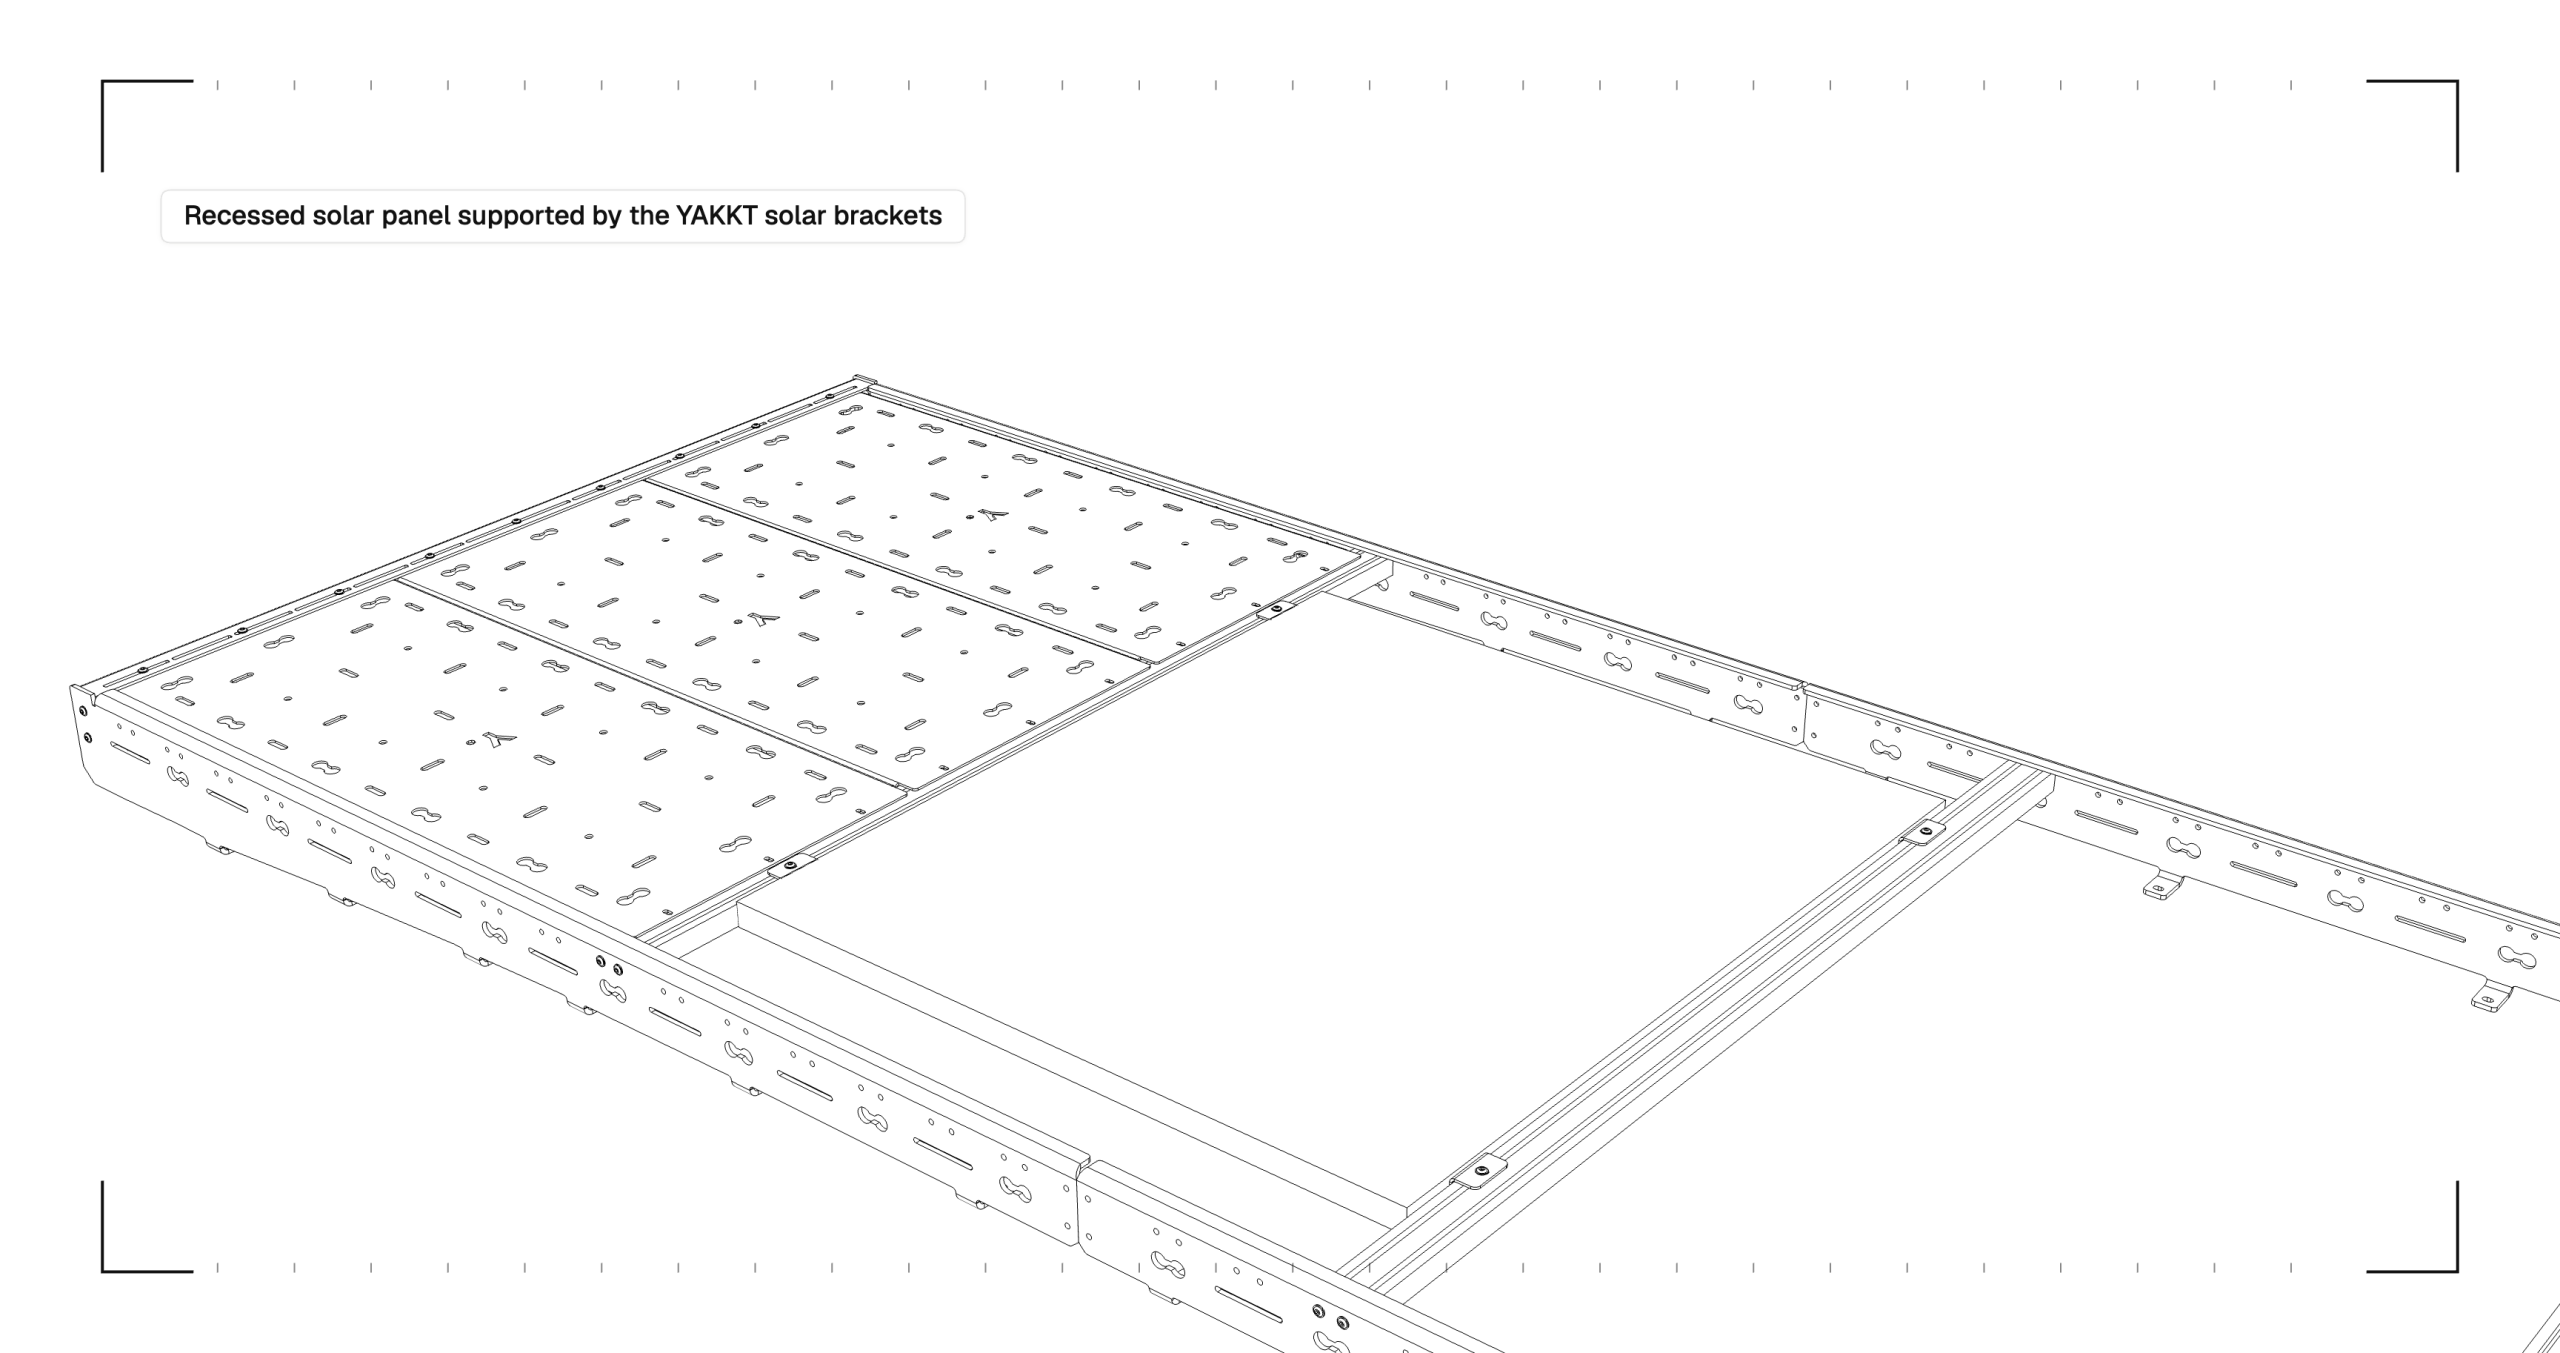
Tighten the bracket bolts into the T-nuts to finish the recess. The finished panel sits flush with adjacent deck panels and side rails — supported by the YAKKT solar brackets at the edges and, on larger panels, the mid support bar in the lower position.
Product page
View Solar Brackets on the YAKKT shop
Need a hand?
Email info@yakkt.com or WhatsApp +44 7871 319441 — we answer fitment questions personally, usually within a few hours.
YAKKT manufactures and supplies modular aluminium roof racks and accessories. We assume no liability for the installation of our products. Customers who install these products themselves are responsible for ensuring proper fitment and adherence to safety standards.


